Working with electricity is not safe for the inexperienced. With that being said, it might be necessary to do so in certain situations. One of those situations could be when you have an electrical wire running outside your house. If this is the case, you should know how to cap off the wire safely and securely.
Outdoor wires can build up a lot of potential energy and cause a deadly shock if they touch metal. However, these hazards are avoidable as long as you know what you’re doing. Read on to learn how to cap off outside wires!
Choosing the Right Clamps
There are a few different types of clamps to choose from. One type is the helix screw clamp, which is best for use indoors. Another is the tension band clamp, which should be used outdoors. The final type of clamp that you can choose is the cable strap with screw or nail. You can use this clamp indoors and outdoors, although it’s best suited for use outdoors.
Depending on where you intend to place your wire, you’ll need to decide which type of clamp to buy. For example, if you have an outside wire that needs to be mounted on a pole or metal surface, then you should buy a cable strap with screw or nail.
If you plan to secure your wire in an indoor location like under a desk or shelf, go with the helix screw clamp. And if you have an outdoor wire that will be mounted near something metallic (like a car), then it would be best to purchase a tension band clamp for safety purposes.
Capping Off Wires Outside
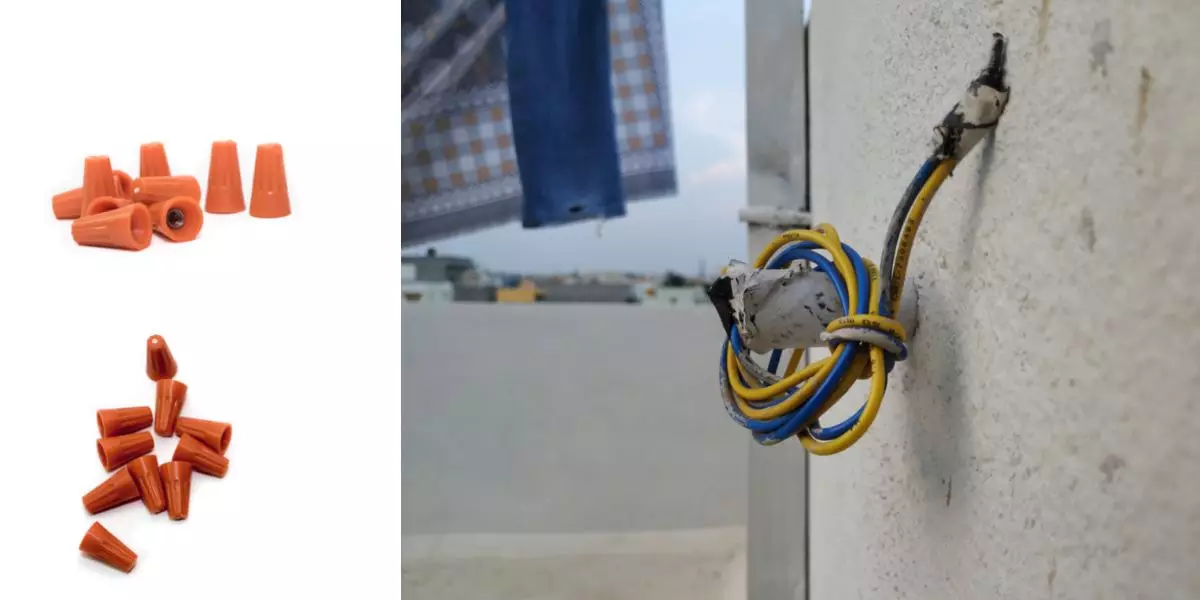
The first thing you will need to do is to secure the wire. You can use a pliers or another set of hands to twist the wires together. This will help to make sure that they don’t touch any other metal and cause a shock.
Next, you are going to want to cover the exposed wire with insulation. You can use electrical tape, PVC tubing, or plastic wrap for this purpose. Be sure that the insulation covers every part of the wire in contact with air and doesn’t touch anything else.
The last step is to cover it with a layer of insulation made from rubber or polyurethane film. This will provide added protection against shocks and weather damage like water infiltration, UV light exposure, and birds pecking at it.
Determine the Length of Wire You Need
To avoid accidents, you need to know the length of wire you need. There are two ways to measure this. The first way is to take a measuring tape and measure from the end of the wire that is currently outside to the point where you want it to end. That measurement should be what you enter into the wire cutter machine.
The second way is to take a measuring tape and measure from the edge of your house or nearest obstacle to the point where you want it to end. That measurement should be what you enter into the wire cutter machine.
Consider the Type of Wiring You Have
Different wiring types need to be capped off differently. This is why it’s important to know the type of wiring before beginning this project.
If you find that your wires are copper, they should be insulated with either rubber or plastic. Copper wire insulation can come in different shapes and sizes, so be sure to get the appropriate size for your wires.
The insulation will go over the copper wire, then be twisted into a loop on each end to create a “cable.” Then, secure the loops tightly with electrical tape and wrap them with heavy duty electrical tape again for extra protection.
If you find that your wires are aluminum or steel, they should not have any insulation on them. Aluminum or steel wires use a different type of capping called an “overload protector.” An overload protector is usually built into the wire and can only be removed by an electrician.
With these types of wires, it’s important to cover up any exposed metal parts with lint-free cloths so that no one is injured when touching them.
Create a Diagram of Your Wiring
The first step in this process is to create a diagram of your wiring. Once you’ve done that, you can start working on the outside wires.
A diagram will help you identify your outside wires and how they connect to inside sources. If you have an electrician around, they may help with the diagramming process.
Place the Clamps on the Ground to Get an Idea of Spacing
In order to cap off the wire, you will need to secure it with a ground clamp. The ground clamp should be placed as close to the cable as possible. You will want to use two clamps on each side of the cable and one in the middle. To place the clamps on the ground, you will lay them down and get an idea of spacing.
Apply the Clamps to Wires in Order to Create a “J” Shape
Nylon wire clamps should be applied to the ends of the wires. They should be tightened as much as possible. To create a “J” shape, you’ll want to attach one clamp at the midpoint of the wire and then another about 3 feet down from that point.
This will ensure that there is no potential for electricity to flow up and down the wire, leading to a deadly shock. Ensure that the clamps are snug so they don’t come loose over time.
Q: What is the process for capping off electrical wires outside?
A: To cap off electrical wires outside, start by turning off the power to the circuit at the breaker. Then, use wire strippers to remove the insulation from the end of the wires. Next, twist a wire nut onto each exposed wire end, ensuring a secure connection. Finally, cover the wire nuts with an electrical box or junction box for protection.
Q: Why do I need to cap off outdoor electrical wires?
A: Capping off outdoor electrical wires is necessary to ensure they are safely terminated and protected from the elements. By capping off the wires, you prevent exposed copper from causing electrical shock or potential fires.
Q: What tools do I need to cap off electrical wires?
A: To cap off electrical wires, you will need wire strippers, wire nuts, and an electrical box or junction box. Additionally, it is recommended to have a voltage tester and electrical tape for added safety.
Q: How do I safely cap off exposed electrical wires?
A: To safely cap off exposed electrical wires, follow these steps: 1. Turn off the power to the circuit at the breaker. 2. Use wire strippers to remove the insulation from the end of the wires. 3. Twist a wire nut onto each exposed wire end, ensuring a secure connection. 4. Cover the wire nuts with an electrical box or junction box for protection.
Q: Can I cap off live electrical wires?
A: It is crucial to never attempt to cap off live electrical wires. Before beginning the capping process, always turn off the power to the circuit at the breaker to avoid electric shock or injury.
Q: What should I do if I encounter live wires during the capping process?
A: If you encounter live wires during the capping process, immediately stop and shut off the power to the circuit at the breaker. Do not proceed until the wires are no longer live and it is safe to continue.
Q: Can I use electrical tape to cap off electrical wires?
A: While electrical tape can provide additional insulation, it should not be used as the sole method to cap off electrical wires. It is best to use wire nuts and an electrical box or junction box for a secure and proper termination.
Q: Is it necessary to cover exposed wires outside?
A: Yes, it is essential to cover exposed wires outside to protect them from damage and prevent electrical hazards. Exposed wires are vulnerable to moisture, animal interference, and physical damage, which can lead to electrical shock or fire.
Q: How can I cover exposed electrical wires outside?
A: To cover exposed electrical wires outside, you can use an electrical box or junction box designed for outdoor use. These boxes provide a protective enclosure for the wires, shielding them from the elements and potential damage.
Q: Do I need to terminate the wires before capping them off?
A: Yes, it is essential to terminate the wires before capping them off. Termination involves properly connecting the exposed wire ends using wire nuts. This ensures a secure and reliable electrical connection.